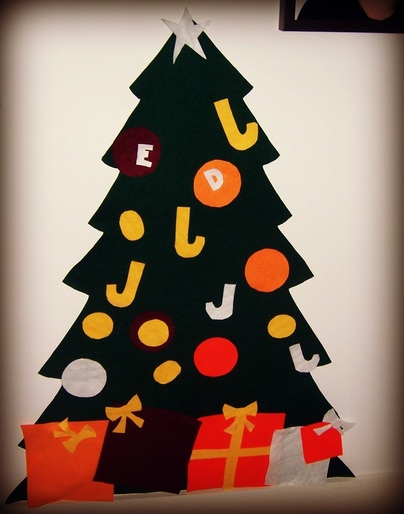
So here's the thing. It's hard to be all glamour at Christmas time with a two year old because it's really just a fight to keep him from kicking the tree baubles around the house every time I turn my back. So in an effort to keep him entertained and do something a little crafty (and by little, I mean not too much effort or expense on my part) I did a little searching on
Pinterest and came across this nifty little crafty idea to keep the kids entertained. I first came across this idea on
Sol and Rachel Do a Blog but there are heaps of different versions on Pinterest and now here is mine!
This felt Christmas Tree can be decorated over and over by the kids (felt sticks to felt - so there is no mess) and packed up and brought back out the following year.
I headed down to Spotlight for the materials and all up it cost about $11. I purchased 1 metre of green felt for the tree and five squares of different coloured felt for the materials.
Here are my tips for making the experience as pain free as possible.
Fold the tree green felt in half. Pin the two sides together and draw your tree design on one side and then cut through both sides at the same time following the lines you have just drawn. If you try and draw the whole tree onto felt to cut out you will never be able to get it symmetrical on both sides!!
Draw templates for your Christmas decorations like the bows, balls and candy canes onto paper once and then reuse the templates by sticky taping them onto the felt and then cutting them out. You can cut through the tape and carefully peal it off the felt when your decorations are cut out.
I outlined a glass onto paper to create my template for the balls. But you could use a range of different circles like a roll of tape or egg cups to create different size balls, which means the kids can overlay them on top of each other or put them up separately.
I stuck my tree to the wall using bluetac and the felt "sticks" to itself - so you can hang the decorations again and again and again.
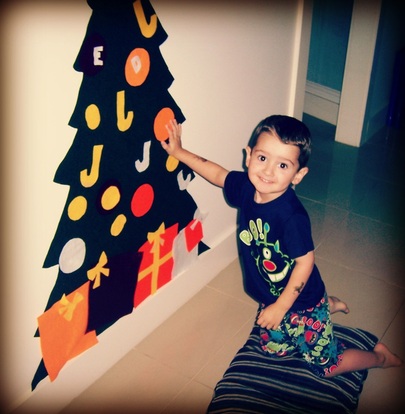
How could you not LOVE this idea!? Look at that happy little face!
I am going to be taking a bloggy break from my usual posting schedule over the school holiday period so that I can spend some time with and on my ferals... I mean children and the rest of my family. I will be doing more the occassional post rather than my usual schedule of posts over this time.
As I will probably be knee deep in kiddy activity stuff up until Christmas and beyond- I would like to take a moment to wish everyone a wonderful Christmas period and a safe and healthy start to 2013. See you in the New Year.
Merry Christmas,
Lee
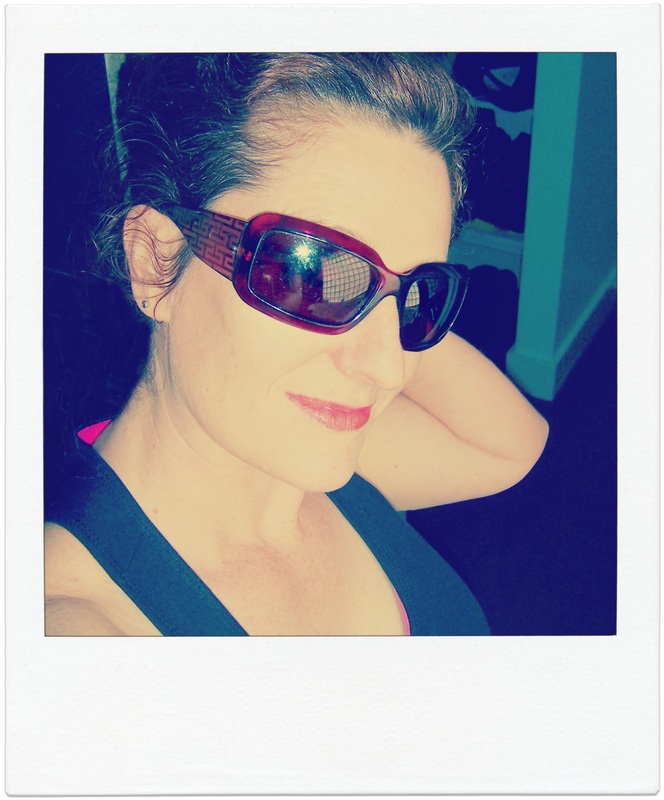
Being very stylish as I am (OK, so I'm not - but one can only try) I wanted to share with you a tip I came across very recently for posing as a yummy mummy (who can afford the time and upkeep of actually being one).
This tip requires medium to long hair, a brush, a hair tie, some bobby pins and a sock.
Yep, you read it right, a sock.
I came across this tip for the sock bun the other day on pinterest.com (if you are not on pinterest, you are seriously missing out) and then I watched some videos on you tube (so I can't actually attribute one person as my source for this). I have put together a couple of images to show you how easy it is to go from "just got home from the gym and can't be bothered washing and drying my hair" to " going out to lunch or to the school pickup or whatever and feeling a little fabulous".
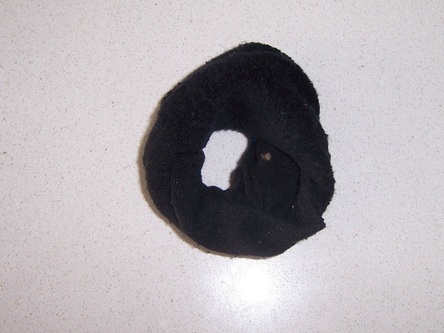
As mentioned the first thing you will need is a sock. Choose one a similar tone to your own hair colour (i.e. if you have dark hair choose a dark sock) it doesn't have to be a perfect match and cut the end (where your toes would normally sit) off.
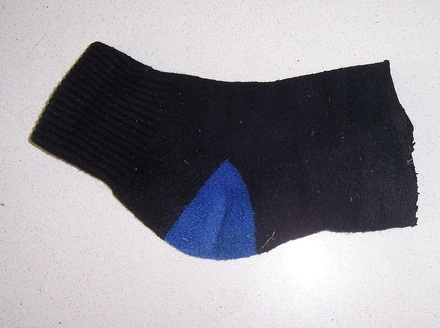
This was my sons sock - there was only one. It had no mate. It went to sock heaven .... I don't know where that is but a lot of my socks seem to have gone there. Just single ones though....
Roll the sock down on itself, like a sock scrunchie - it looks kind of like a sock donut.
Now this last bit was too hard to photograph and do at the same time so I just have to use words and then show you the finished look (I am a very visual person and like images myself, so type sock bun into youtube if my instructions aren't cutting it for you).
Brush your hair into a high ponytail using an elastic hair tie. Then slide just the end of your ponytail into the sock donut. Roll the tips of your hair over the donut to sort of cover it with hair and tuck the ends back into hole of the donut from underneath. You are effectively rolling your hair over and into the donut. Then just keep rolling the donut down the length of your ponytail while tucking the hair inside the donut as you go.
When you get to the base of the ponytail (your head) you can pin it into place for extra hold.
You might ask why you should bother with the whole sock shenanigan and not just whip your hair up into a regular bun, so I have included a before and after shot to demonstrate the difference.
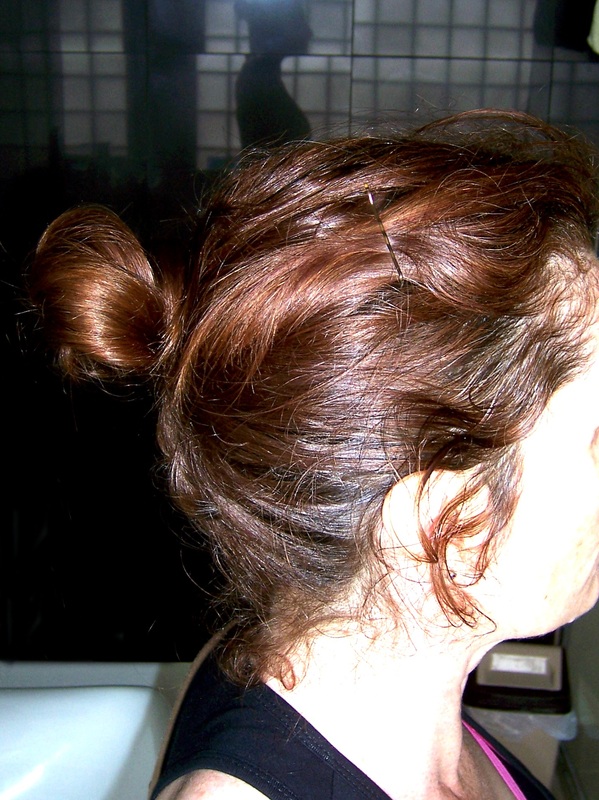
BEFORE - with my going to the gym bun
|
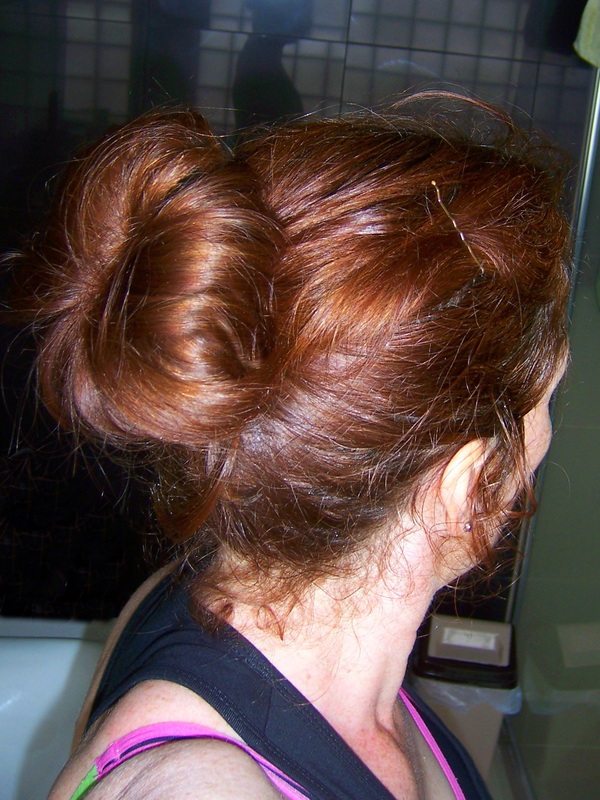
AFTER - with my glamorous new do.
|
You could add a flowery clip for some extra glamour and a swipe of lippy.
You should be good to go then glamour puss.
That's all, I just wanted so share this with you. You can actually buy hair donuts from the shops but I thought it was nice to be able to feel a bit special with stuff I already had lying around the house.
I would love to hear any cheap and easy tips for looking fabulous you would like to share.
Cheers,
Lee
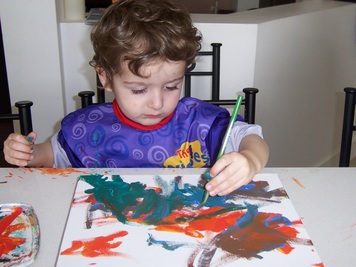
Starts off nicely enough. Focused and playing with colour.
I don't ever remember a time when my mother put down a load of washing or pushed the house cleaning aside to sit down and play a game with me because she felt guilty that we weren't doing enough activities together. Not that I have a bad mother, that's just the way it worked then. Your mother said "get out from under my feet and go outside and play" and you did. So why is it that mother's today suffer from this guilt? You feel bad if you don't get down to their level and play enough. You feel bad if your kid isn't signed up to enough activities because he might be missing out, or worse falling behind. You feel bad that you are not interacting enough with them. Perhaps you should be making flash cards or homemade playdough or cities from old shoe boxes! I personally blame those overly organised people who make everything look effortless and look like they are always doing worthwhile, fun, yet organised stuff with their kids, including making flash cards. I wonder if there's a class to become one .....
Anyhoo, in an effort to do more with the kiddies (as opposed to just cleaning up after them) I set up some paints, a small canvas and a paint smock for my 2 year old. I thought I was thoroughly prepared. Great idea you'd think..... not so, but at least he enjoyed it. So I guess we reached our objective even if the National Art Gallery is not beating a trail to my door any time soon.
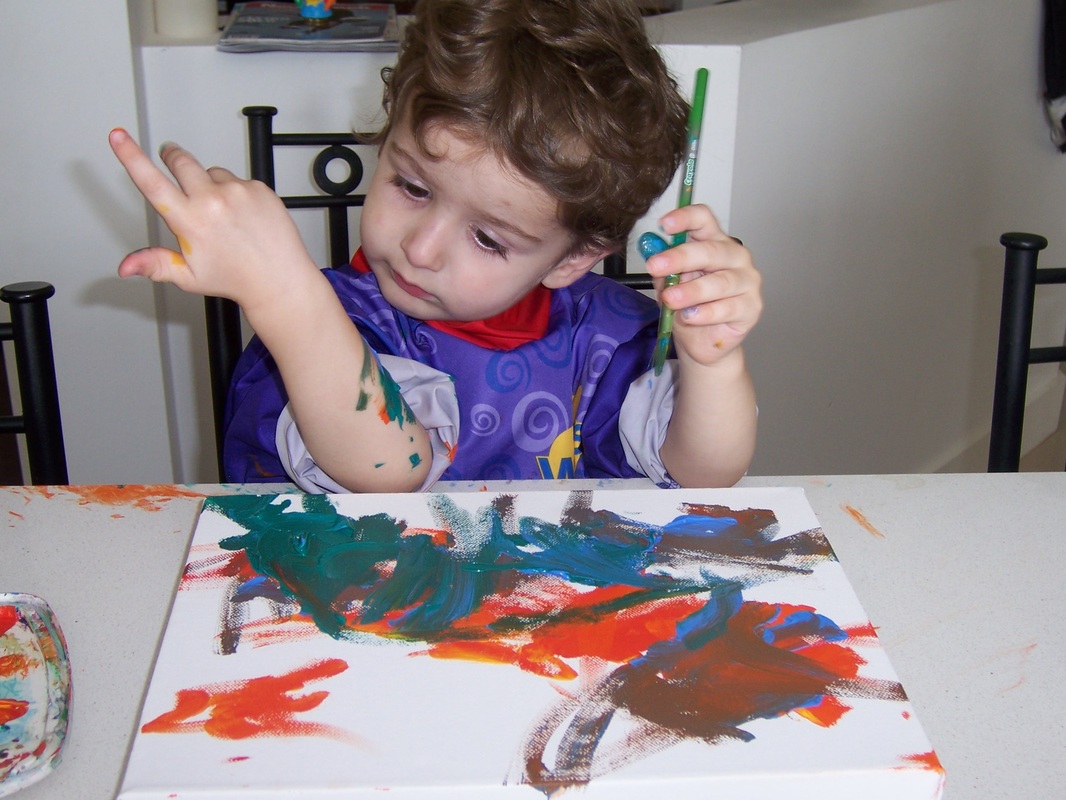
Wow, how did that get there?!
I missed a spot, I'll just fix that up there.
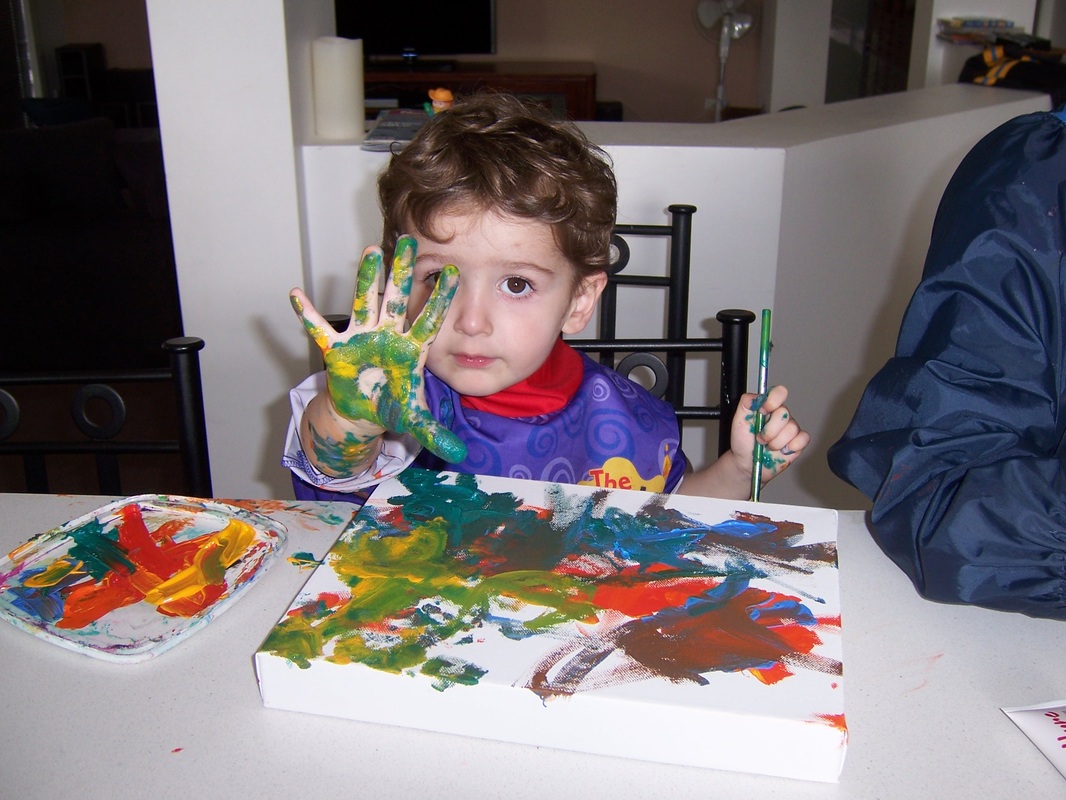
So there are other things to use than the brush and this is what happens.
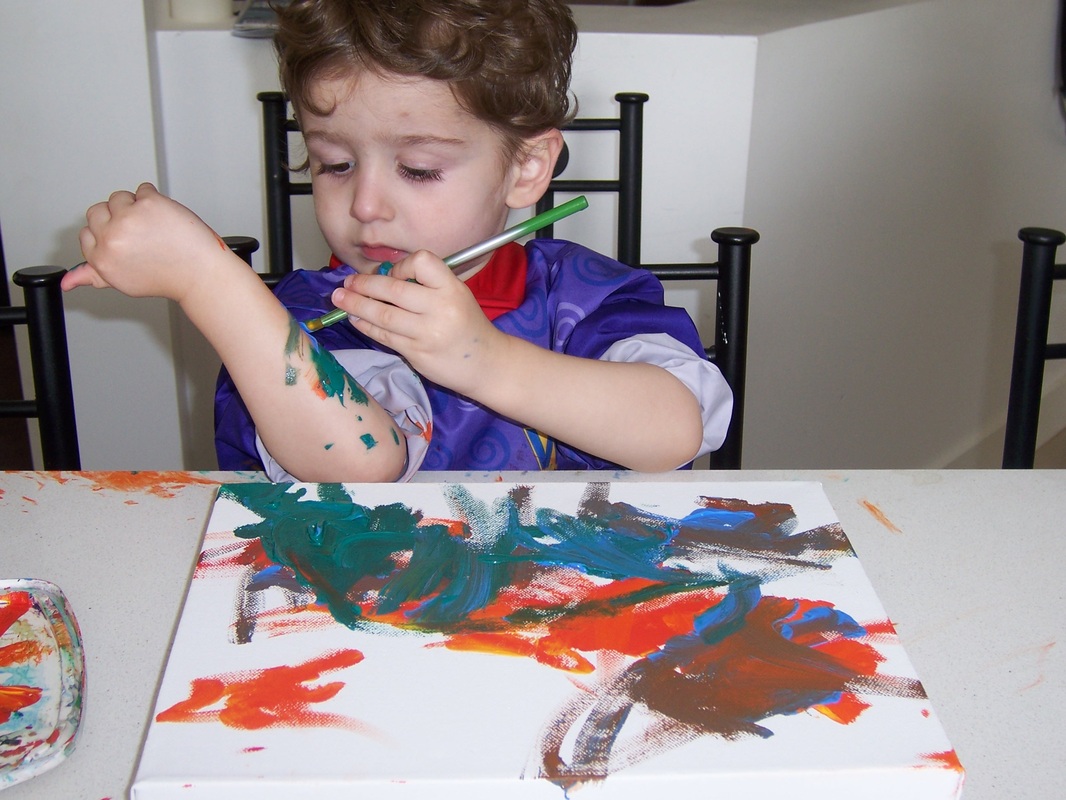
The take away lesson I got from that was that I should only give him one colour at a time. Too many colours were just too much to handle at once - and clearly all colours are supposed to be mixed into one disgusting colourless mess if that's what you are given.
Just so you know, I also had a paint shirt on - just in case messy little hands started to get a bit too touchy feely and it did take quite some time to clean up after. So, not only did I take time away from cleaning up to participate in the activity but it also created more work.... but that's how it goes with kids. That's how they roll....
So, what sorts of activities are you participating in with your little people and how have you fared with yours?
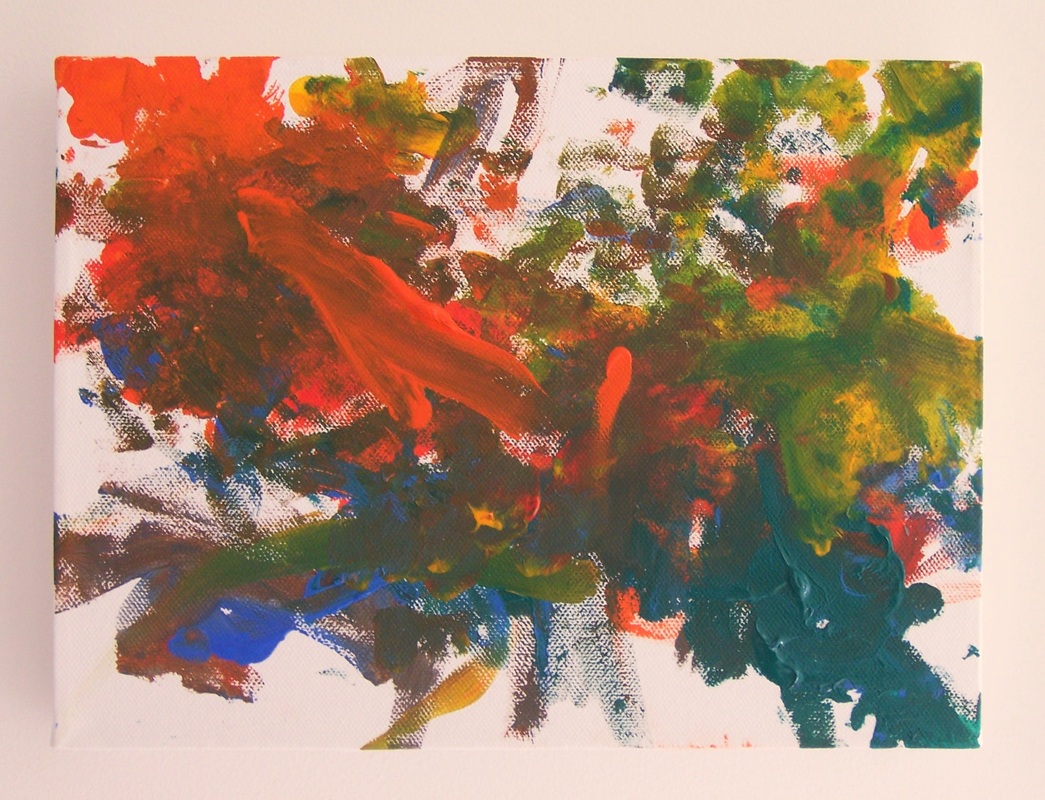
The finished "work of art"
I also wanted to let you know that Mother Load has now joined
Facebook so come and say hi!! On reading an article about social media overload recently, it got me thinking about my blog challenge and what I would like to achieve with my blog, so I have decided to make a few changes from blogging everyday to blogging every Monday, Wednesday, Friday and on special occassions. I want Mother Load to continue to be fun and fresh and I don't ever want to get to a point where I am repeating myself and it's not fun for me (or you!). I will also be around on facebook every other day, posting away.
Have a wonderful Weekend and see you on Monday!!
Cheers,
Lee
Hey there Groovy Chicks,
I hope that you have had a great week.... and if not it's almost the weekend, so perhaps next week can be a do-over. I know as a stay at home mum that not having a regular "working" day or even working week can mean that days often blend into each other. I know myself I have forgotten what day it was a number of times this week. So I have put together a few lovely things to inspire, motivate or perhaps just make you smile.
Lunch Box Inspirations and Pretty Tasty Things

Timbuktu Magazine
|
Picture from design-dautore.com
|
I don't know that I have the time or energy to actually make either of these "dishes" but I
thought they were great anyway. Lunch box inspiration never goes astray. If you
have a go yourself I would LOVE to see it! And that cake looked so beautiful -
what can I say.... I love a good cake.
Crafty Stuff to do with the Kids
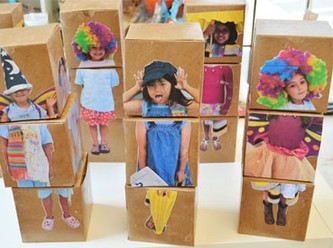
from www.smallhandsbigart.com
I really love this idea. Very simple but lots of fun!! There are a few options for making these. You could have some dress up fun first (each child needs four different outfits - so you have a picture for each side) or you could just use magazine pictures. Either way it would be fun. You can get the kids involved in the cutting and gluing and then the actual fun of mixing and matching the bodies. I know kids love doing stuff which is all about them, so having pictures of your kids to do this with would only add to the entertainment value. Instructions are at
http://smallhandsbigart.com/blog/featured-article/mix-match-dolls/ if you want to see how they did it and learn from their mistakes. Awesome idea!
The winner of ........ I wish I was there right now.

Italy in the summer picture from design-dautore.com
I included this picture because it has been so very cold in Melbourne lately and I really wanted to be there in the warm... and it looked so very beautiful.
Websites to Check Out
OK, lastly I know I have already brought up
www.picmonkey.com before but if you have not had a little play with it already you are really missing out. So I have decided to include (with her permission, of course!) a before and after example from someone I have converted to a lover of picmonkey. No, I am not on commission... I just
love what you can do with it!!

Before picmonkey
|

After picmonkey.
I told you it was impressive!! |
Anyhoo, I am hoping you have enjoyed today's joylights. These really are a few of the things that have brought me some joy this week or just amused me.
Have a wonderful weekend.
Cheers,
Lee
PS Sending a big warm fuzzy hug and I hope you feel better real soon to my BFF Daniela, who is not doing so well this week.
In the round up of things I liked, or that amused me or images that brought me
some joy this week it was very difficult to stop adding things!
I have come across some amazing images, projects and fun stuff but I did manage to narrow it down to a small selection - or taster if you will - of stuff I liked this week. After all, we are all busy girls and we only have so much time to dedicate to things other than households, kids and everything else in between.
Stuff which would take too much time to actually make but I liked the look of anyway......
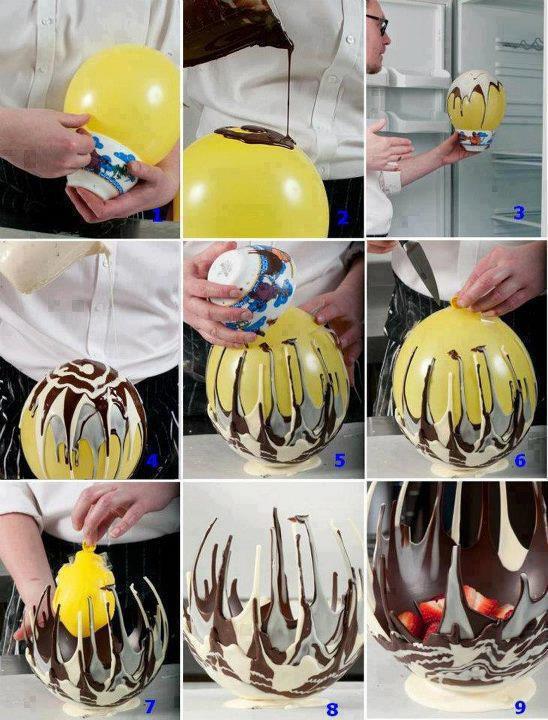
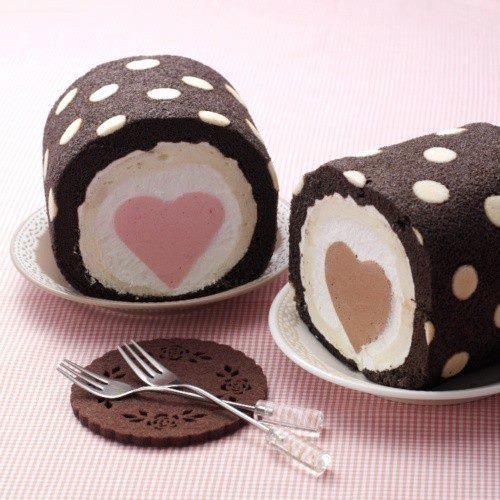
From Boutique Buffets
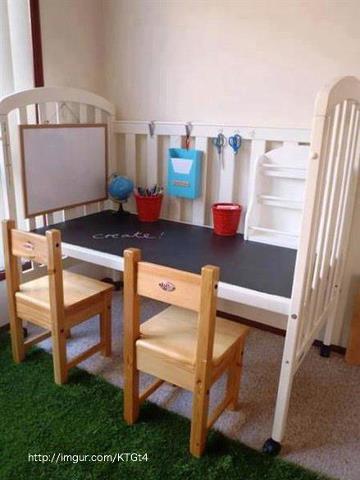
I loved, loved, loved the finished look of this amazing little chocolate "desert bowl". It looks incredible and I'm sure would really impress - but I don't believe I would have the dedication to follow it through to completion? And you? | I loved the idea of being able to recycle the cot into something so useable. I may store this idea away for future consideration. Or perhaps this is another one of those moments where I turn to my husband and say .... Oh honey, how busy are you? I have the best idea ....
|
And who doesn't love cake??
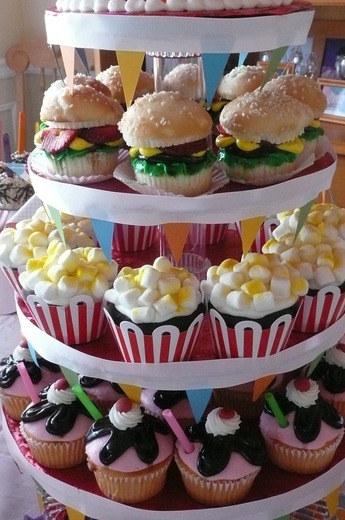
From Catchmyparty.com
|
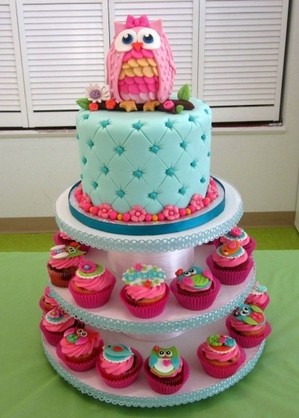
From Cakecentral.com
How beautiful are these wonderful little cakes!! I would never have the patience to actually make them myself but I thought they were desirable none the less, so I wanted to share them with you.
|
Favourite Photo Editing Site
A friend of a friend recommended picmonkey.com for photo editing - and I thought "I don't have time to learn another new thing" but I went and had a look anyway ... and I'm totally hooked on picmonkey. It has really easy photo editing tools, lots of lovely filters and tricks to make your so, so images look - fabulous. And it is FREE - yay free!!
I think there may be plans to charge for extra tools or filters at some time in the future but don't let that put you off. There is even a wrinkle remover and a lip gloss tool - in case you didn't have time to slap something on before the camera was brought out. You can even add text and little stickers and all sorts of fun stuff too, to create cards (if you have the energy). Here is a little sample of a before and some afters so you can see what picmonkey does. Anyway don't take my word for it ... go check it out yourself.

Before
|

After using a few filters.
|

After using different filters and having a bit of a play.
|
I hope you have enjoyed looking at these lovely things and perhaps were inspired by one of the ideas... at the very least go and take a look a picmonkey.com and glam yourself up with the airbrush tool, you'll know then how those ladies in the women's mags look so much better than women in everyday life.
Enjoy,
Lee

 RSS Feed